I bought this 1933 (Type 16) Stanley Bailey #3 hand plane in a flea market. The knob and tote were in absolutely stunning condition for being 83 years old. As a matter of fact, the entire hand plane was in stunning condition for being that old.

As you can see, it was it pretty rough shape. My ultimate goal is to have a full set – or as close to full as I can get – of Bailey hand planes that I have restored. This was my first full restoration. In retrospect, I should have made a video on how I did it. Perhaps on the next one!
I started by taking the plane completely apart, inspecting each piece as I removed it for signs that the piece was no longer usable (e.g., stripped threads, cracks, rust too deep to remove, etc.). I got pretty lucky on this one…everything was usable.

Next came the task of removing the rust…a task that is no small undertaking, I assure you. Step 1 in this process is finding a container to put the parts in as they soak in the rust remover. I did not have anything that was big enough for the parts, yet small enough that I would not need a gallon of rest remover. So…I decided to make one. To do this, I needed to lay out all of the pieces in the smallest pile I could so I could get measurements.

I added 1/4” to all each side and used those dimensions to cut dados in the bottom piece to receive the sides. I cut the sides to fit and just held them together with blue tape. I went around the box’s exterior twice to ensure it would hold.

Next, I lined the box with plastic; in this case, I used a trash bag.

I placed all the parts in the box in the order I had stacked them before, or at least as close as I could. I then put in the rust remover. I used Krud Kutter, which worked amazingly well. I let it sit for 24 hours. As an aside, I put it outside….Krud Kutter STINKS!!

The next step is scrubbing, followed by scrubbing, then a little more scrubbing after that. Believe me, this takes a while (depending on the extent of the rust, of course). I recommend doing this outside. The fumes are harmful, not to mention enough to make you gag. As you remove each piece from the container, wipe it off well so you can see where the rust remains. I used wet/dry sandpaper and steel wool. It seemed to work rather well. I did not use any power tools in the rust removal process, as I did not want to take the chance of taking a piece out of square. I also sanded down the front knob and tote and refinished them using wipe on poly. I do not have any pictures of these steps, unfortunately.
One of the most tedious tasks in hand plane restoration is the flattening of the sole. If (once you have removed the rust) there is not any pitting in the sole, this process is not so bad. All you have to do is affix some wet/dry sand paper to a flat surface (e.g., a piece of marble or granite, a thick piece of glass, etc.) and sand the sole and sides to flat. If there is some pitting, this process becomes far more difficult, as you have to sand the entire sole down past the deepest pit. To be honest…this SUCKS! In this case, the pitting was severe. I tried to hand sand the sole, but the pitting was just too deep. I wound up taking the body to a machine shop and having them resurface the sole and sides.
Now it is time for paint. I did not remove all the old paint; I just hit everything thoroughly with a wire brush to make sure all the loose chips were removed. I then masked off all the parts that should not get painted.


And…the freshly painted pieces.

And a pic of everything laid out…

And the final project…

All said, this was a really fun project. Then again, I think most projects are fun. It was a lot of work, but, ultimately, I sincerely felt a sense of accomplishment finishing this piece. To me, owning a hand tool this old is profound. I will never know how many projects this hand plane was used in…how many woodworkers held it in their hands…how many people were influenced by the pieces this tool was used to create. I own a piece of woodworking history. Perhaps that is silly…perhaps not.
Here are a few more closeups of the finished piece.


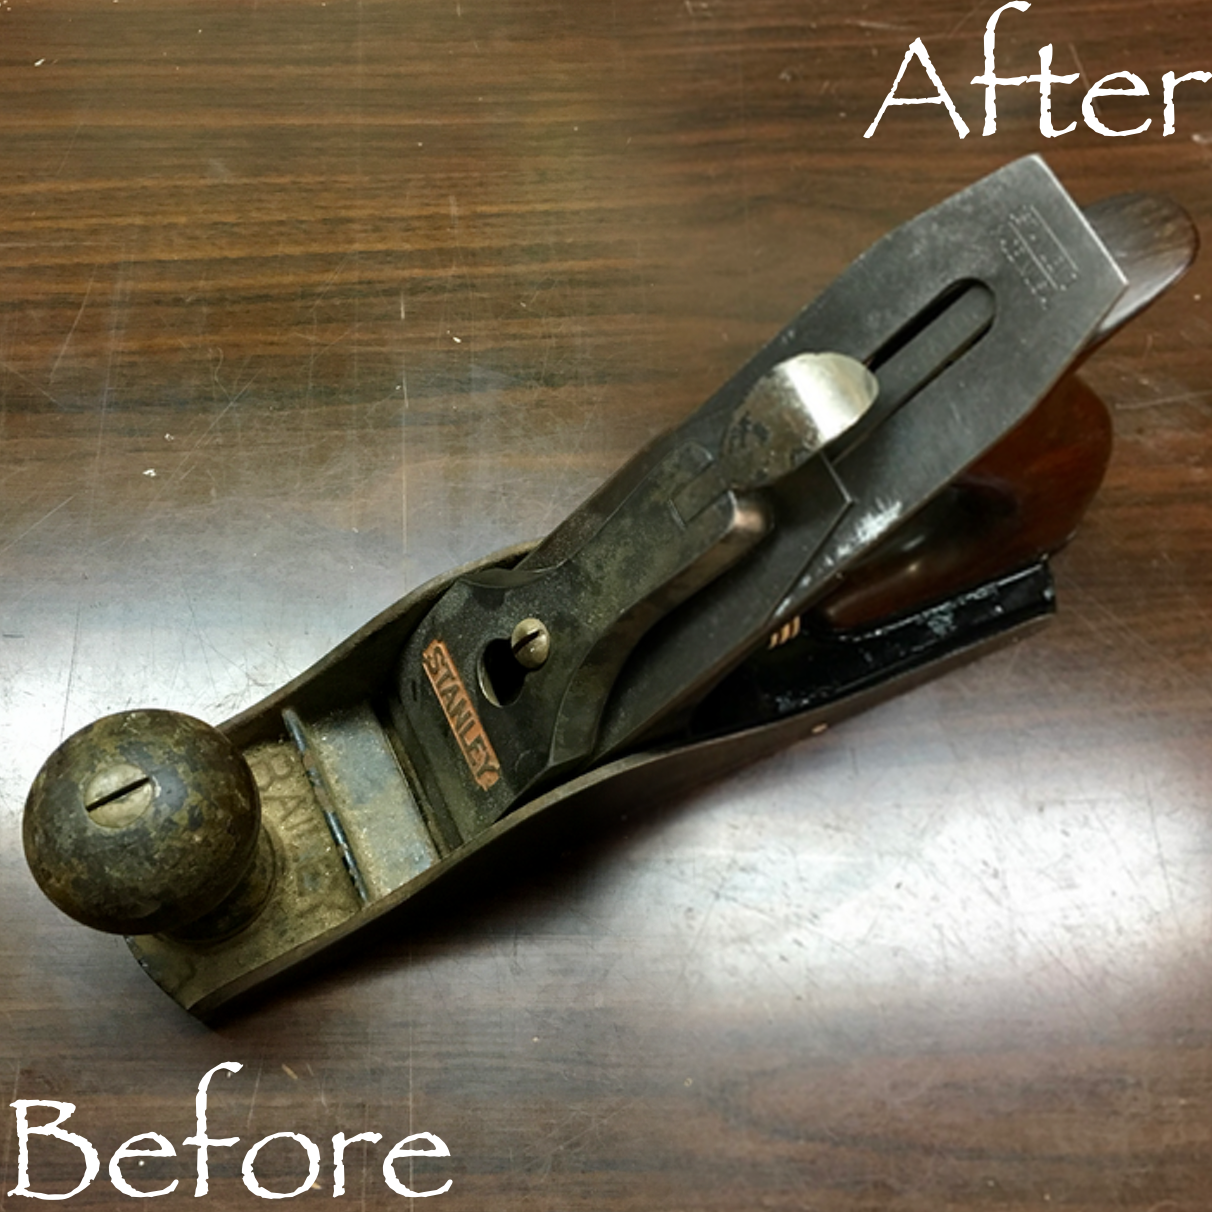
Before and After Side-by-Side Comparison Pics


